If you want a factory-smooth finish on a refinished bathtub, you need a spray gun. There’s no other way to get there.
Brush and roller work. The finish is functional and durable. But there’s texture — that slight stipple pattern from the roller. On a flat wall you might not notice or care. On the inside of a bathtub where the light hits at every angle and you stare at it every morning, it’s noticeable.
A good HVLP system gives you a glass-smooth finish that looks like the tub came out of the factory that way. After 20+ years doing this professionally, it’s not something I’d give up.
Here’s what you need to know before you buy.

Why HVLP Over a Compressor Spray Gun
There are two main types of spray systems: turbine-driven HVLP and compressor-driven spray guns.
Compressor-driven guns use an air compressor to atomize material. They can work well, but for bathtub refinishing they introduce problems:
- Moisture in compressed air — unless you have a very good moisture trap and filter, water vapor from your compressor ends up in your finish as fish eyes or adhesion failures
- Oil contamination — similar issue if your compressor isn’t properly filtered
- Pressure regulation — you need to dial in pressure carefully, and it can vary
- Compressor size — underpowered compressors run out of air mid-pass
Turbine HVLP (what I use and recommend) eliminates these problems. The turbine generates its own warm, dry air. No moisture traps needed. No oil. Consistent pressure. Plug it in and it works.
For someone who isn’t spraying every day, turbine HVLP is the significantly better choice. It’s more forgiving, more consistent, and doesn’t require the supplemental equipment that compressor setups demand.
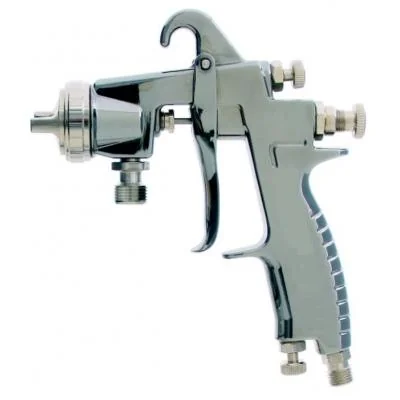
Top Pick: Fuji Semi-Pro 2 HVLP Turbine System
This is the system I used professionally for years. It’s also the most recommended HVLP turbine system among professional refinishers who aren’t running a full production shop.
Specs that matter:
- 2-stage turbine motor, 1,400W
- Bottom-feed gun with 1-quart pot
- Non-bleed style gun (no air flow when trigger is released — saves material and reduces overspray)
- Heat-resistant hose
Why it works for bathtub refinishing:
The 2-stage motor gives you enough power to properly atomize the viscosity of most refinishing coatings without thinning them down so much you lose material properties. 1-stage turbines struggle with heavier refinishing coatings — the atomization gets coarse and you end up with orange peel.
Parts are readily available. Needles, nozzles, cups, o-rings — you can get them. With budget turbine guns from no-name brands, parts availability disappears in a year.
Easy to clean. The gravity feed design (bottom feed with the pot) means you’re cleaning a simple cup and feed tube, not a complex siphon system.
Setup for Bathtub Refinishing
Needle/nozzle: Use a #3 (1.3mm) tip for standard bathtub coating viscosity. Most refinishing coatings at proper application viscosity work well with this size. If you’ve thinned the material a lot, you can go to a #2 (1.0mm), but I find #3 better for coverage.
Distance from surface: 8–12 inches. This is the most common thing to get wrong. Too close (under 6 inches) and you get runs and sags. Too far (over 14 inches) and the material is partially dry when it hits the surface — you get orange peel and poor flow-out.
Fan width: 6–8 inches. Wider patterns are for large panels. For a bathtub you want a controlled, mid-width fan.
Air pressure: Start at 4–5 psi and adjust. The turbine system regulates this somewhat automatically, but you have an adjustment knob. Lower pressure = larger droplets = more material in less time = more run risk. Higher pressure = drier atomization = faster flash = orange peel risk.
Always test on cardboard first. Set up a piece of cardboard on the edge of the tub, spray a test pass, and evaluate the pattern before you put material on the tub surface. Adjust as needed.
Application Technique
Preparation Before Spraying
The same prep rules apply whether you’re rolling or spraying — actually the prep is MORE important with spray because flaws are more visible on a smooth surface.
- Complete all cleaning, sanding, and repairs before spraying
- Silicone contamination that causes fish eyes is even more obvious under a spray finish
- Wipe down with lacquer thinner last, then touch nothing with bare hands
The Motion
Hold the gun perpendicular to the surface (not angled — angled means one edge of the fan is closer than the other, producing uneven coating).
Move in horizontal passes with a consistent speed. Don’t slow down at the ends — maintain speed through the pass and release the trigger after you’ve passed the edge.
Overlap each pass by 50%. The center of pass #2 should land on the outer edge of pass #1.
Keep moving. If you stop or slow down mid-stroke, you get a run or a sag. There’s no hesitating.
Cutting In First
Before your main spray passes, use a 2-inch brush to cut in the corners, the inside curve at the bottom of the tub, and any areas where the spray gun can’t maintain a consistent distance. Then roll over these with your main spray passes.
If you’re doing the whole tub by spray (no brush), spray the inside curves and corners with a slightly lighter pass, then come back with full-weight passes on the flat surfaces.
Coats
Two coats minimum. Always.
Let the first coat flash — until it’s dry to the touch but slightly tacky — before the second coat. Check your coating instructions for the recoat window. Too early = solvent pop (bubbles). Too late on a two-part product = adhesion issues between coats.
The second coat is where you get the smooth, full surface. The first coat seals and builds the base.
Cleaning the Gun
After every use: Flush the cup and feed tube with lacquer thinner. Run it through the gun until it runs clear. Empty and wipe the cup.
Full teardown (after every 3–5 uses, or whenever you finish a project):
- Remove the needle/nozzle/aircap assembly
- Soak in lacquer thinner for 15–20 minutes
- Use a small brush to clean around the nozzle seat
- Blow out with compressed air (even a can of compressed air works)
- Reassemble and dry-fire briefly to confirm clear
Don’t let refinishing coating dry in the gun. It’s nearly impossible to remove once cured, and you’ll ruin the needle seat.
Troubleshooting Common Spray Problems
Orange Peel (Bumpy Texture, Like Orange Skin)
Cause: Material is drying before it can flow out smoothly. Fix:
- Move closer to the surface (8 inches instead of 12)
- Thin the material slightly (check manufacturer’s recommendations — don’t over-thin)
- Reduce air pressure slightly
- Check that turbine is warmed up (spray into a rag for 30 seconds before starting)
Runs and Sags
Cause: Too much material in one area. Fix:
- Move farther from the surface
- Move faster
- Reduce fluid flow (turn the fluid knob counterclockwise slightly)
- Less overlap per pass
If you get a run, don’t touch it while wet. Let it cure, sand it out, and recoat.
Fish Eyes (Small Craters)
Cause: Silicone or oil contamination on the surface. Fix: Stop spraying. Let what’s applied cure. Reclean the surface with fresh lacquer thinner (check for contamination source). Recoat.
This is almost always a surface prep problem, not a gun problem. Fish eyes mean something is on the surface that shouldn’t be.
Sputtering or Spitting
Cause: Air in the fluid, or the cup isn’t sealed properly. Fix:
- Check the cup is tightly seated
- Make sure there’s enough material in the cup (running low causes air ingestion)
- Check the fluid inlet for debris
Dry Spray / Rough Surface
Cause: Material is drying too fast before it hits the surface. Fix:
- Move closer to the surface
- Reduce air pressure
- Material may be too thin or room temperature too high
- Gun may be too far from surface
Is It Worth It for a One-Time DIY Job?
Honest answer: if you’re only doing one tub, probably not. A Fuji Semi-Pro 2 is around $300–$350. If you’re refinishing your own tub once and moving on, the roller method is fine.
Where it makes sense:
- You’re a professional or semi-professional refinisher
- You’re doing multiple tubs (rental property owner, flipper, etc.)
- You’re doing a high-visibility tub where appearance really matters and you want the best possible result
The good news is that once you have a quality turbine HVLP, it’s useful for other things — furniture, cabinets, exterior trim. It doesn’t collect dust after the tub job.
For the full DIY refinishing process, see how to refinish a bathtub.