This is the complete guide. Not a summary. Not a teaser. If you read this and follow it exactly, you will end up with a refinished tub that lasts years.
I’ve been refinishing tubs professionally for over 20 years. I’ve seen every mistake. I’ve fixed jobs that went wrong. The process isn’t complicated — but the prep is unforgiving. Skip a step and you’ll be peeling tape off a peeling finish six months from now.
Let’s do this right.
What You’ll Need
Get everything before you start. Running to the hardware store mid-job with chemicals open in the bathroom is a bad plan.
Tools:
- Putty knife
- Razor blade scraper
- Screwdrivers (flathead and Phillips)
- Utility knife
- Orbital sander + 120-grit sanding discs
- Green Scotchbrite pads
- Stiff-bristle grout brush (for corners)
- Measuring cup or mixing cup
Safety (required, not optional):
- 3M Organic Vapor Respirator — a dust mask does nothing for chemical vapors
- Safety glasses
- Nitrile gloves
- Ventilation fan
Cleaning and Prep:
- BarKeepers Friend powder
- Silicone digester (ask at the hardware store, or order online — not optional if there’s any silicone caulk present)
- Lacquer thinner (buy good quality — cheap stuff has water contamination that causes finish defects)
- Tack cloth
Repairs:
- Evercoat Polyester Filler or Bondo (for chips and cracks)
- 80-grit and 120-grit sandpaper (for shaping repairs)
Application:
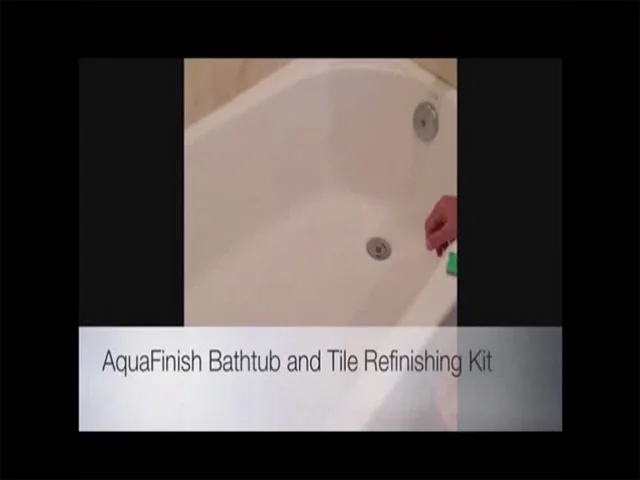
- AquaFinish Bathtub and Tile Refinishing Kit — or your kit of choice
- High-density foam roller (usually included in the kit)
- 2-inch brush (for cutting in corners)
- Drop cloth for the floor
- Plastic sheeting for walls
- Masking tape (blue painter’s tape)
- Latex gloves (to wrap fixtures)
Caulking:
- DAP Kwik Seal Plus — or any non-silicone tub and tile caulk. NEVER use silicone caulk on a refinished tub.
Step 1 — Set Up Ventilation First
Before you open anything, set up your ventilation.
Point an exhaust fan out the window or tape it to the exhaust opening above the door. The goal is to create negative pressure in the bathroom — air flowing out, not just circulating.
Run the fan continuously from step one through the entire job and for 24 hours after you finish.
If your bathroom has no exterior window: leave the bathroom door cracked an inch with the fan running. Place a towel at the base of the door on the outside to slow fumes spreading through the house. This is not ideal but it works.
Put on your respirator before you open the kit. Keep it on while you’re in the room.
Step 2 — Remove the Drain
Yes, you’re removing the drain. I know the instructions on most consumer kits say you can tape around it. Don’t. You can’t get clean edges taping around a drain, and the coating will eventually lift at the edge.
How to remove it:
Pop the overflow plate (the plate with the lever near the top of the tub — two screws). Remove the lever and set aside.
For the drain itself: insert a flat drain key (or two needle-nose pliers into the cross members) and turn counterclockwise. Most drains haven’t moved in years and are tight — a long screwdriver through the pliers gives you more torque.
If the cross members in your drain are broken or missing, you’ll need a friction drain removal tool. See how to remove a stuck or broken bathtub drain.
Once the drain is out, plug the drain hole and overflow hole with rags. You don’t want to lose anything down there during the job.
Step 3 — Remove All Caulk
Use a utility knife to score the caulk on all sides, then use a razor blade scraper to peel it off. Get every bit along the perimeter, around the drain, along the deck (if applicable), and at any corners.
Take your time here. This is not where you rush.
Step 4 — Remove Silicone Residue (Critical)
This is the most important step most people skip.
After you remove visible caulk, there’s almost always silicone residue left on the surface — invisible to the eye, impossible to remove with bleach, alcohol, or regular cleaners. If any silicone contamination remains, the coating will lift right over it. It might look fine for a week, then you’ll start seeing bubbles and peeling at the edges.
Apply silicone digester to all areas where caulk was present. Follow the product directions — usually apply, wait 10–15 minutes, wipe off, then clean the area.
No silicone digester? You can get it at most hardware stores or online. This is not a step you can skip.
Step 5 — Clean the Surface Thoroughly
Mix BarKeepers Friend with water to make a thick paste. Using a green Scotchbrite pad, scrub the entire tub surface — bottom, sides, ledge, everywhere the coating will go. Update: Lime-A-Way has become our go-to for heavy soap scum and mineral buildup — spray it on first, let it sit 5 minutes, rinse thoroughly, then follow up with BarKeepers Friend. Never mix chemicals directly — always rinse completely between products.
Scrub hard. Rinse completely. Scrub again.
The test: After rinsing, run a clean, dry finger across the surface. It should squeak. If it doesn’t squeak — if it feels even slightly slippery or smooth — there’s still soap residue or contamination on the surface. Scrub and rinse again.
Don’t rush past the squeak test. This is your indicator that the surface is actually clean.
Step 6 — Sand the Surface
Using your orbital sander with 120-grit discs, sand the entire tub surface. The goal is not to remove material — it’s to create mechanical tooth (microscopic scratches) for the coating to grip.
Use consistent passes. Hit the corners and hard-to-reach areas by hand with folded sandpaper.
After sanding, wipe the entire surface with lacquer thinner using a clean cloth. Lacquer thinner does two things: it removes the fine dust from sanding, and it chemically prepares the surface.
Important: Use good-quality lacquer thinner. Cheap lacquer thinner has water contamination that causes fish eyes (small craters) in your finish. Buy it from a paint store, not a dollar bin.
After the lacquer thinner, don’t touch the surface with bare hands. The oils from your skin will contaminate it. Work with nitrile gloves from here on.
Step 7 — Make Repairs
Now is when you fix chips, cracks, and gouges — after cleaning and sanding, before applying any coating.
For porcelain chips and minor gouges: Mix Evercoat polyester filler (or Bondo) per directions. It starts setting in about 10 minutes, so only mix what you can use quickly. Apply with a plastic spreader, slightly overfill the repair, and let it cure fully (usually 20–30 minutes).
Once cured, sand the repair flush starting with 80-grit, then finish with 120-grit. The repair should be level with the surrounding surface — no high spots, no divots.
For fiberglass cracks: See the fiberglass bathtub refinishing guide — the repair process for fiberglass cracks requires a different approach (stop-drilling, fiberglass patch kit, then polyester filler over top).
After repairs, wipe the repaired areas again with lacquer thinner.
Step 8 — Mask Everything
Cover everything you don’t want coated:
- Faucet handles and spout: wrap with a latex glove secured with tape, or use plastic bags
- Walls: tape plastic sheeting or paper to the wall above the tub ledge
- Floor: drop cloth over the bathroom floor
- Drain hole (if drain is removed): stuff a rag in it
- Overflow hole: tape over it
Use blue painter’s tape along the tub ledge and any wall tiles. Press the tape down firmly at the edge — any gaps will allow coating to bleed under and give you a ragged edge.
Step 9 — Apply the Bonding Agent
Almost all quality refinishing kits include a bonding agent (also called primer or adhesion promoter) as a first step. Follow your kit’s instructions exactly for mixing and application.
The bonding agent is what makes the topcoat actually stick to the tub surface. Don’t skip it. Don’t under-apply it. Apply it per the manufacturer’s directions and let it flash (dry to the touch) per the instructions before moving on.
Step 10 — Apply the Topcoat
Option A: Brush and Foam Roller (Beginner-Friendly)
Use a 2-inch brush to cut in all the corners, edges, and curved areas where a roller won’t reach. Then use a high-density foam roller for the flat surfaces.
Roll in one direction with light, even pressure. Overlap each pass by about 50%. Keep a wet edge — don’t let one section dry while you’re working on another.
Option B: HVLP Spray Gun (Best Finish Quality)
If you have access to an HVLP turbine system like the Fuji Semi-Pro 2, you’ll get a significantly smoother finish than brush and roller. Spray gives you a glass-smooth surface. Roll-on will have slight texture.
For spray application, reduce the material per your kit instructions, test your setup on cardboard first, and keep your distance consistent at 8–10 inches from the surface.
Coats:
Apply a minimum of two coats. One coat always looks thin, shows unevenness, and gets scratched faster.
Let the first coat flash per your kit’s instructions — usually 20–40 minutes — before applying the second coat. Don’t wait so long that the first coat is fully cured (you want some chemical bonding between coats).
The second coat is applied the same way as the first. Slightly heavier is fine.
Step 11 — Remove Masking and Re-Caulk
Check your kit instructions for when to remove the masking tape — most kits say to remove tape while the coating is still slightly tacky (usually 2–4 hours after the last coat). Waiting until it’s fully cured can cause the tape to pull paint with it.
Remove tape slowly and at a 45-degree angle. Don’t pull straight up.
Wait the full recommended cure time before caulking. Most kits want 24–48 hours.
When you caulk: use non-silicone caulk only. DAP Kwik Seal Plus, DAP Alex Flex, or similar latex/acrylic tub and tile caulk. Apply a thin, consistent bead, tool it with a wet finger, and let it cure per the product instructions.
Never use silicone caulk on a refinished tub. Silicone prevents the refinishing coating from adhering to the area around it, makes future touch-ups impossible, and is generally difficult to work with. Non-silicone caulk is the professional choice every time.
Cure Time Before Use
Do not use the tub for 48 hours minimum. Many kits say 24 hours, and that’s the functional minimum, but 48 hours gives the coating proper hardness before you’re standing on it and running water over it.
Keep the bathroom ventilated with the fan running during the cure period.
Pro Tips
Cheap lacquer thinner causes fish eyes. Cheap lacquer thinner has water contamination that causes small craters (fish eyes) in your finish. Buy it from a paint store, not from a discount bin.
Two coats minimum, every time. One coat always looks underwhelming and scratches fast.
Fan running the whole time, no exceptions. Not just for safety — ventilation also helps the coating cure properly and reduces sag risk.
Work from back to front. Start at the far end of the tub and work toward the door so you’re never painting yourself into a corner.
Temperature matters. Ideal application temperature is 65–80°F. Too cold = slow cure and possible adhesion issues. Too hot = faster flash, harder to maintain a wet edge.
Don’t cheap out on the respirator. The 3M half-face respirator with OV/P100 cartridges is the one. It’s around $35. The cartridges are available everywhere. For more on safety, see are bathtub refinishing fumes dangerous?
Let everything cure before touching up. If you see a drip or thin spot, resist the urge to fix it while it’s wet. Wait until it’s cured, sand lightly, and reapply. Messing with wet coating almost always makes it worse.
After the Job: Keeping It Looking Good
A properly done refinish can last 12–15 years with proper care. The main things that shorten the life:
- Abrasive cleaners (Comet, Ajax, scrubbing pads)
- Drain cleaners (Drano, Liquid-Plumr) — these eat the finish
- Suction-cup bath mats — they pull the finish off when you remove them
- Hair dye — stains the finish permanently
For the full care guide, see how to take care of a refinished bathtub.
Watch the Full Application Process
This is real footage from an actual refinishing job — you can see exactly how the gun is held, how the passes overlap, and what a proper wet edge looks like in real time. Worth watching before you start.
Recommended Products (Quick List)
- AquaFinish Refinishing Kit — best consumer kit
- 3M Organic Vapor Respirator — required
- BarKeepers Friend Powder — solid for cleaning prep. Update: Lime-A-Way is actually the best we’ve found now for cutting through soap scum and mineral deposits before refinishing — use it during the Step 5 cleaning stage
- Evercoat Polyester Filler — for repairs
- DAP Kwik Seal Caulk — non-silicone caulk for finishing
For kit options and comparisons, see the best DIY bathtub refinishing kit guide.